|
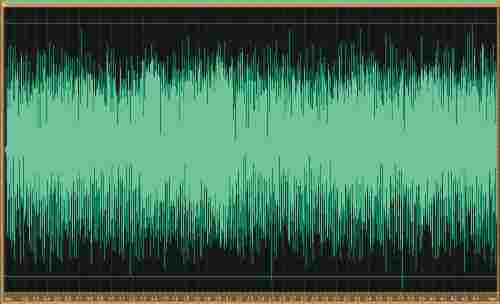
Start material |
||
 |
||
|
mp3-file |
Duration: |
|
Filtering of Voices using Software
CoolEdit 2000
by Rolf-Dietmar Ehrhardt
To use a computer with the right software to process EVP utterances offers many advantages compared to normal 30-Band-Equalizer, 30-Band-Audio-Realtime-Analyzer, parametrique filtertechnique and the use of oscilloscopes. Of course there go disadvantages with it like the need of a computer and the right software.
In this month I had a reason to get busy with software and computer for the first time to filter an EVP utterance. This sample came from IoTC member Dr. Ostafin and is an excerpt from a longer contact. The result achieved was astonishing for me. It is quite clear that the following example can not be transfered easily to other utterances. Of course have the parameters to be modified.
The following example should encourage you! Please compare the "start material" with the preliminary result. When playing back these voices adjust your software equalizer from CoolEdit or from GoldWave to achieve best results.
|
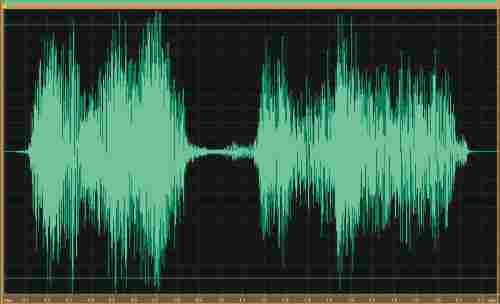
Result after filtering |
||
 |
||
|
mp3-file |
Duration: |
|
If you like to know how this result has been achieved then please continue reading!
Start your work without fear, being aware that you have the chance to use "UNDO". That allows you to make mistakes when using the wrong way to denoise the utterance in order to get a voice. CoolEdit 2000 has a recover function which will bring you back to the old stage.
Some advices ahead:
Only utterances with at least 16 bit resolution should be processed. If you have only an 8 bit signal then sample it to a higher level.
That program works more precise when the amplitude of the signal is not too low. Therefore the signal should fill almost the screen before you start the next procedure in processing the voice. You can amplify the signal going this way: make a double klick on the signal so its looks white ant then perform "Transform/Amplitude/Amplify" - Calculate Normalization Values - Peak Level 100% - Calculate Now - "OK".
To enhace the quality it is advisable to process utterances in the .WAV-format. When you got a sample in the .MP3-format then storage it under a new name to avoid misunderstanding by mixing up names of the files. Having finished your work you can save that file in the .MP3-format to to send it to others or to publish it in the Internet.
It is advisable to save each successful processed step by using increasing numbers of the file, f.e. sample1.wav - sample2.wav and so on. Using this way you know always which file is most actual. Having finished your work you rename the file with the highest number (f.e. sample13.wav) and delete the other no longer neccessary files.
|
Program used: |
CoolEdit 2000 |
|
Name of the Audio-file: |
muster.mp3 - 16 bit - mono - 395 KB |
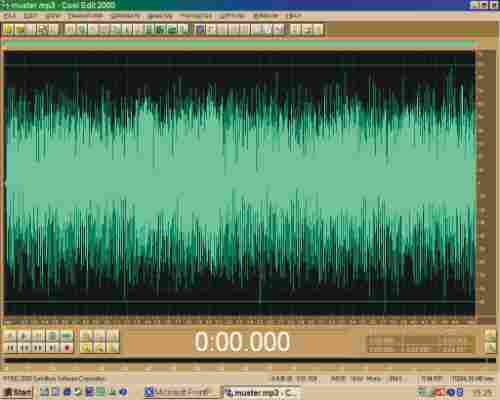
Giving this example I have used the original file in .MP3-format, not converting it in the .WAV-format. You listen to the utterance and recognize that between 0,0 - 0,8 sec there is only noise. Of course you can "overhear" a potential voice. You mark this time area by pressing the left mouse key and pull to the right. This sector is now white. To be sure you listen again to this marked range. Important: Only in those marked sectors your tasks will be processed.
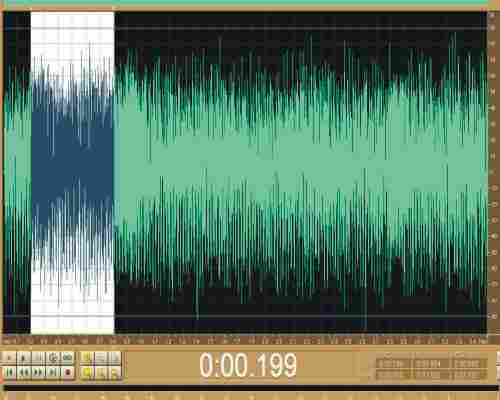
Being sure that this sector only contains noise you go to: "Transform/Noise Reduction/Noise Reduction" and check the following parameters:
|
FFT size: 8192 |
Reduce by: 100 dB |
Then you go to: "Get Profile from selection" and further to "Close". Now a double click with your left mouse key somewhere on the signal - the whole field looks white now.
Now back again to "Transform/Noise Reduction/Noise Reduction" - Noise Reduction Level auf HIGH und 140 - ckecking all the other above mentioned values and then "OK".
This procedure should be performed also for the time range 2,2 - 3,2 sec. This is still an area with strong noise. In case that you have the impression that you have denoised too much, in fact you have influenced your voice too much - then perform "UNDO". In this case you should reduce the NOISE Reduction Level and perhaps Reduce by value and listen to the voice again.
You mark now 0 - 1,5 sec and cut this off by clicking on the scissors symbol. The time scale has changed now. And now you cut off also the range from 0,85 - 2,65 sec using the same procedure.
Making a double click on the signal you will see it in white again. Then you go to "Transform/Amplitude/Amplify" - Calculate Normalization Values - Peak Level 100% - Calculate Now - "OK". Keep in mind please that this could have been neccessary already while performing steps before.
Your screen should show something like this:
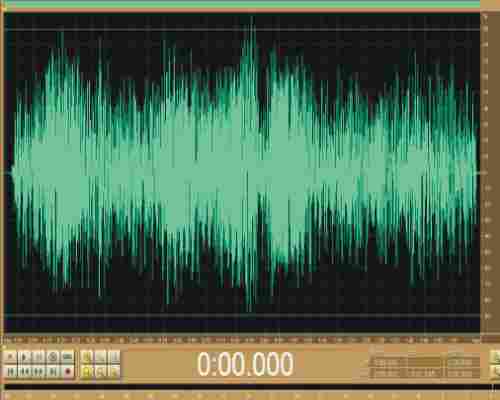
If you replay this voice one cannot be quite satisfied:
Please compare this voice now with the voice called "Result" in the beginning. This voice called "Result" could be achieved by trying that program CoolEdit 2000 which was new to me. I made a big mistake not making a protocol when performing all the steps. Although I spend a lot of time to reproduce this result - I was not successful. Instead of that there appeared "new" voices starting with the same "start material". One can say also: my focus or my attention was directed to other voices in the same sample. I should mention to you that my ears are not the best.
Using the "normal" devices like the above mentioned I am still convinced that it is more effective to concentrate on the "RECORD-Mode" because there exist clear and loud voices that need not to be processed to be understood. Why?
If you have a signal that interferes with 50 Hz resp. 60 Hz hum or with a constant whistle sound (f.e. acoustic regeneration) then CoolEdit with its FFT filter can be used. Some filters are already predefined like those for 60Hz hum - "60 Hz Notch" or "60 Hz + 120 Hz Notch" to eliminate hum.
Please open the file that should be processed:
|
|
If you toggle from "Waveform view" to "Spectral view" (in Menü: 'View -> Spectral View'), then you can see immeditaley the disturbing whistle as a light band at about 3 kHz:
|
|
To find out the frequency of that whistle you can perform a FFT (Frequency analysis). Look at the picture below. Please mark the area of the signal and go to 'Analysis -> Frequency Analysis' and click on the 'Scan'-Button. The disturbing whistle can be recognized as peak in the diagram. In this particular example there are two peaks at around 3 kHz, which shows that there are in fact two whistles. (Knowing this and looking again at the diagram above one can see that the light band is wider in some areas).
If you take the cursor to the flanks of the peaks then the frequencies of the begin and of the end of the peaks will be shown. If you widen the window then you will get a better resolution. In this example the frequencies are between 2870 Hz and 2990 Hz resp. 3130 and 3280 Hz. The "mean-frequency" of the highest peak is shown in the field "Frequency".
Using the "FFT-Filter" function you can determine a Notch-Filter that fits exactly to the frequency(ies) found out. Go to 'Transform -> Filter -> FFT Filter' and by using the mouse key form the filter curve to the desired shape. To eliminate a point use "Drag & Drop" and pull the point out of the window. With a double click on one point you can type in frequency and amplitude. In this example two small Notch-Filters have been defined using the values found out in the frequency analysis:
Click on 'OK' filters the signal. Looking at the diagram will show that the light horizontal band at 3 kHz has been eliminated:
|
|
To make comparison easier here the signal again:
These short examples should show what can be done using only some of the possibilities that program offers. Using "Expand" or "Stretch" you can run certain marked parts of your voice slower or faster in order to make voices better understandable.
When you process a voice/a signal then of course you have to manipulate it. To avoid misunderstandings give always the "original" signal and the "processed" signal to knowledge of those who are interested a n d name the procedures you used. So everybody can do the same applying your methods: having a signal and later on hearing a voice.
rodiehr 30052001
|
You are visiting our website: W |